I busted out my carpentry skills on this DIY project, baby. And while I was mildly concerned about my woodworking abilities, this project ended up being surprisingly easy. Think about it...an ottoman is a cube with legs covered in fabric. With simplicity in mind, lets get started.
What you need to be working with...
 |
| 1. Wood (specifications to come) 2. Wood Glue 3. Sand Paper 4. Cotton Batting 5. 2" Foam 6. Staple Gun 7. Fabric |
Here's what you do...
Step 1. Get Some Wood.
At your favorite hardware store, purchase (2) 8-foot 1x3 pieces of plywood and (1) 8-foot 2x2 piece of plywood.
Step 2. Cut It.
You need to cut, or you need to ask your friendly saw-possessing friend, family member or hardware store employee to cut your wood into the following pieces:
(7)1x3 pieces at 15.5"
(4)2x2 pieces at 16"
(4)1x3 pieces at 15"
Sand rough edges with you sandpaper and get your wood glue ready.
Step 3. Glue!
Visualize your cube. This entire project was held together with wood glue, yes wood glue. Elmer's Wood Glue boasts a bond stronger than wood itself. Trust your Glue. Use your Glue. For one side, use 2 of your 2x2 pieces as your base, attach a 15.5" pieces along the top edge of the 2x2's. Attach another 15.5" one inch from the bottom. Repeat this process to complete a second side.
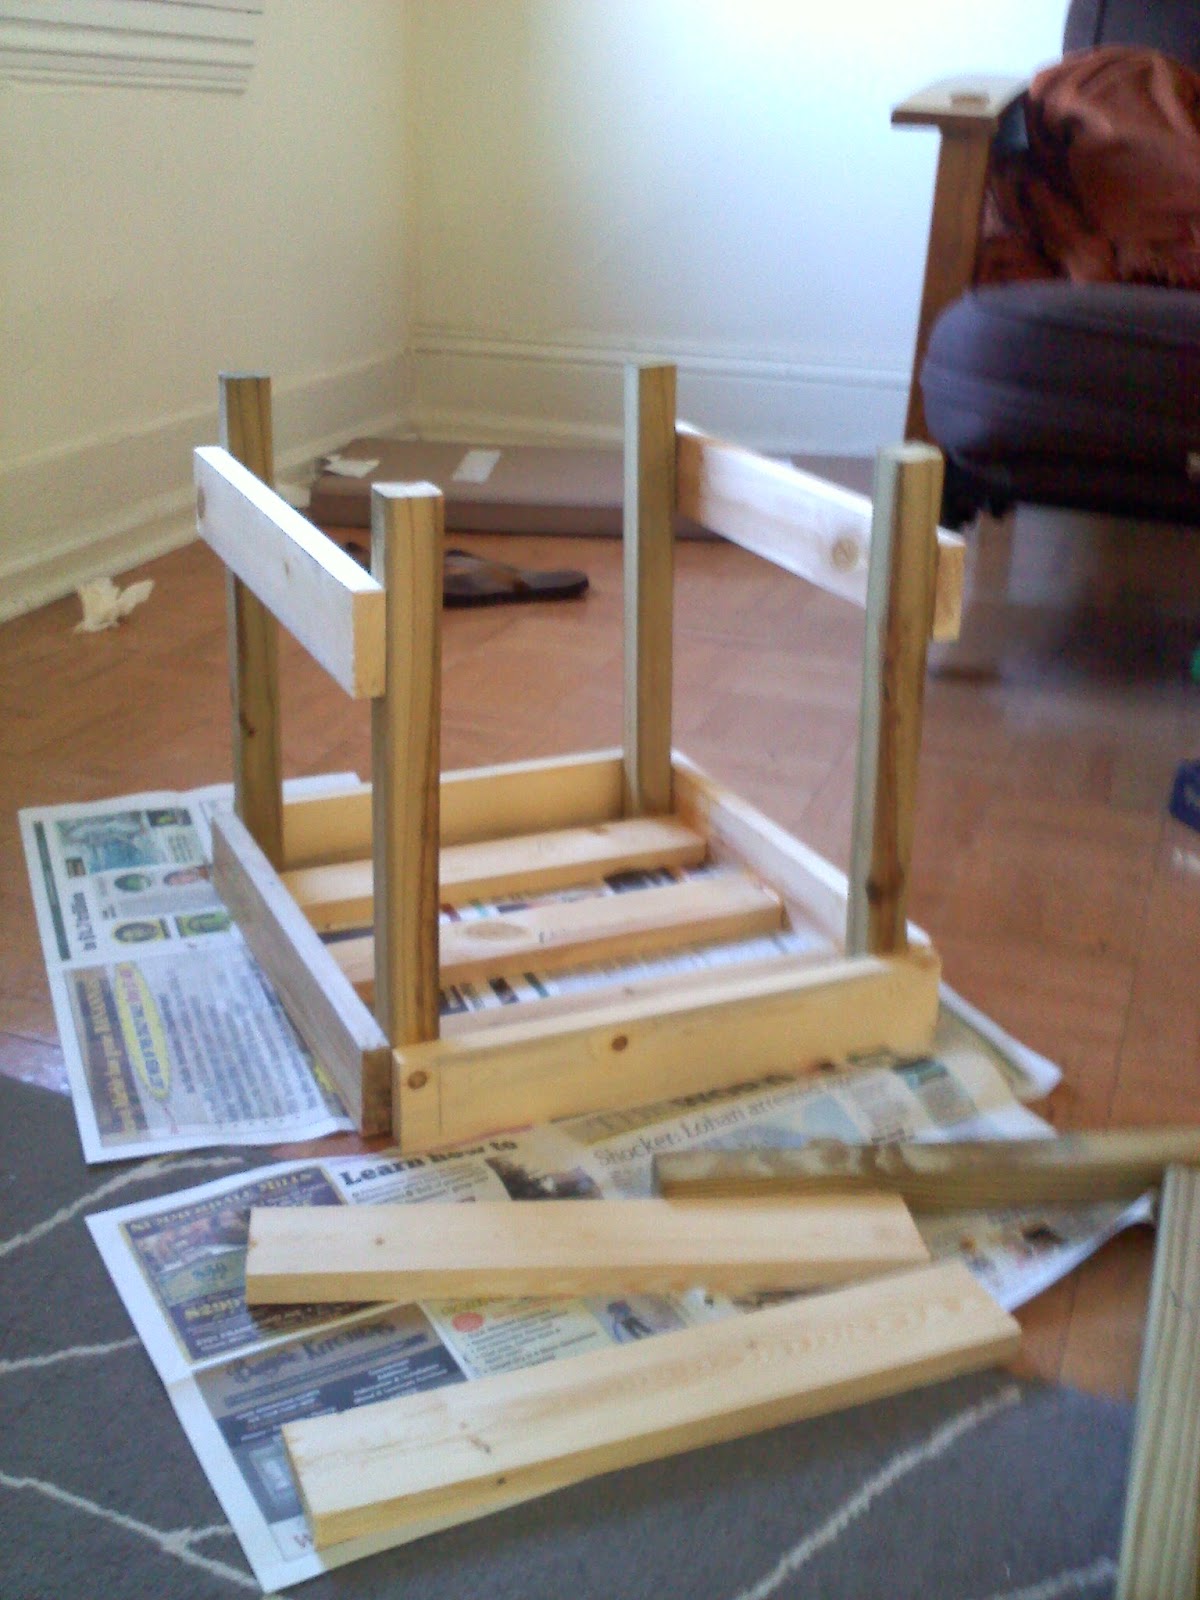
Then attach these two pieces using a 16" piece on each side along the top edge. While this was setting, I also attached the seat slats made from the remaining 3 15.5" pieces spaced evenly.

Use your last 16" pieces to secure your legs one inch from the bottom of your 2x2 pieces aligning with the pieces already attached.

And taa-daa! Your base is complete! You do have the option to add additional security to your seat slates by hammering a finishing nails into each side of the slat. I also painted the 1" legs of my ottoman in black spray paint, this helps make the end product more finished (see the painted legs in upcoming photos). Time to add the cush!
Step 4. Pad and Cushion.
Using a roll of cotton batting, wrap your ottoman base with with the batting and attach it with your staple gun. I used Farfield Family of Cottons 45x60-80x20 Quilters Cotton Batting.

I suggest stapling the batting on the top of upper edge so that the edges are soft and you avoid banging body parts into them when sitting on them later. You really only need to to staple on the top and bottom as the fabric covering will hold the rest secure. Top with a 2" thick heavy duty foam slab cut into a 16x16 square.

Step 5. Cut your Cover.
To cover your cube, all you need is 5 squares sewn together into a bottomless cube and then you just slip the baby on. I used a thick, utility fabric (Imagine canvas combined with upholstery fabric). Cut your squares into 17x17' squares. For those who are inexperienced sewers, though it is a 16x16" cube, the extra inch allows a half inch seam allowance on each side.

Step 7. Sew your Cover.
Sew four of your squares together edge to edge with a half inch seam allowance. Then attach the remaining piece to the top edges of these pieces to complete your cover. It should look like a bottomless cube as I mentioned earlier, but failed to take a picture of it. Sorry!

Step 8. Wrap It!
Slip on that cover. Shimmy it on, it should be snug so it will hold on the foam cushion and batting. Flip it over and use your staple gun to attach your fabric to the underneath bottom edge.


Step 9. Flip it!
You're Done. This is what the final outcome was. I made one in pink and loved it so much, I made one in purple!


Don't they look great? They were so easy to make I could barely believe that I built a piece of furniture. Either could my roommate who watched in disbelief during the entire process but she was pleased with the way they turned out so she agreed to keep them.

Lined up with a previously owned piece, we now have a lovely row of ottomans that occupy the main wall in our living room. I added an accent pillow for a little flair. I have been collecting vintage trays lately and think they add some versatility to soft furniture since that can safely add a surface for displaying frames, candles, books or knick-knacks, so I threw one on. Of course, ottomans are light weight pieces that can be moved and used as a foot rest or to accommodate guests with a place to sit or set their drinks. Love it!
One of several projects to revamp the living room down, more to come.
Until next time...
Keep your eyes on the sky...
<3 ray
Igot-it@: Wood, Lowes. Elmer's Wood Glue, Joann Fabrics. Farfield Family of Cottons 45x60-80x20 Quilters Cotton Batting, Joann Fabrics. 2" Heavy Duty Foam, Joann Fabrics. Staple Gun, Ace Hardware. Utility Fabric, Joann Fabrics.
ClickIt!:
http://www.lowes.com/
http://www.joann.com/
www.acehardware.com/
No comments:
Post a Comment